

What you'll need:
Cookie cutter(s)
Treat bags with ribbon
What to do:
Make the sugar cookies according to the instructions on the package. There will be a slight variation to make cut-out cookies (usually its just adding some flour). Rolling the dough and cutting the shapes is annoying... but you get to eat more scraps that way so just eat your way through the process :) Let cookies cool completely for about 30 minutes before decorating.
I started by outlining the cookie with Wilton's Cookie Icing, and I found that heating the icing in the microwave for about 30 seconds to start, and then zapping it for ~10 seconds every handful or so of cookies kept it soft enough to work with.

Then go back and fill in the outlined cookies with icing. If you heat up the icing, it helps it to "flood" more easily. Be patient - this is really tedious and your hand will start to hurt, but fill in your outline completely and try to swirl around the tip of the icing dispenser to get rid of any air bubbles.
 This next part is really important... let the icing dry completely!!! I can't tell you how many cookies I ruined making cookies for Danielle's baby shower because I couldn't just sit still and let them dry. I learned my lesson... this time I gave the cookies a solid 45 minutes of dry time before I continued decorating them. When the icing is allllll the way dry you're ready to decorate with the Decorating Icing.
 If I've learned anything at all about dessert decorating over the course of all my Martha Stewart wanna-be baking adventures, its this: Piping bags (and tips) are your friend! Even when using pre-packaged icing, I always always use a piping bag. The reusable ones are great, and for these cookies I just used a plain round piping tip. I've also found videos like this to be really helpful ~ I can now fill my icing bag and fasten the top so that I don't end up with a mess of pink icing all over my hands :) It's the little things...
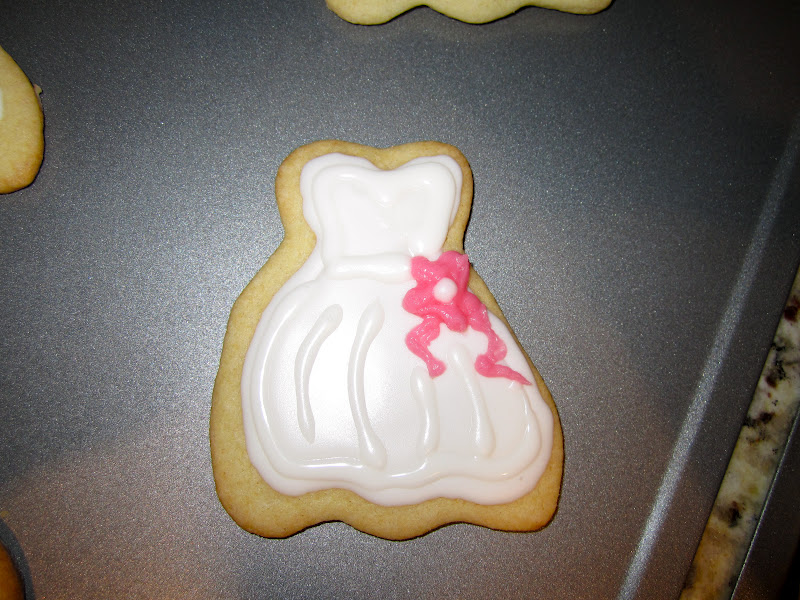
Once your icing bag is filled up, you're ready to pipe! I browsed Pinterest for some inspiration ideas, but I sort of just made up my own designs until I settled on one I liked.
 After I had my pink flowers on each and every cookie, I used the Wilton's Icing Writer to add some white-on-white accents to the cookies. This added texture and interest... but it was also great for hiding imperfections!
 I traced back over the flower petals so that they were a little neater and raised a little higher. Then I let them dry for a loooong time. At least an hour before I started packaging them. I actually used lollipop bags that came with ribbon attached (found at Michael's) and cut little hearts out of a sheet of scrap book paper for the packaging. They turned out so adorable!

 These were really fun and easy to make. They weren't "perfect" but thats what made them so unique! There was no denying that they were homemade... and most importantly, the bride loved them :)
 |
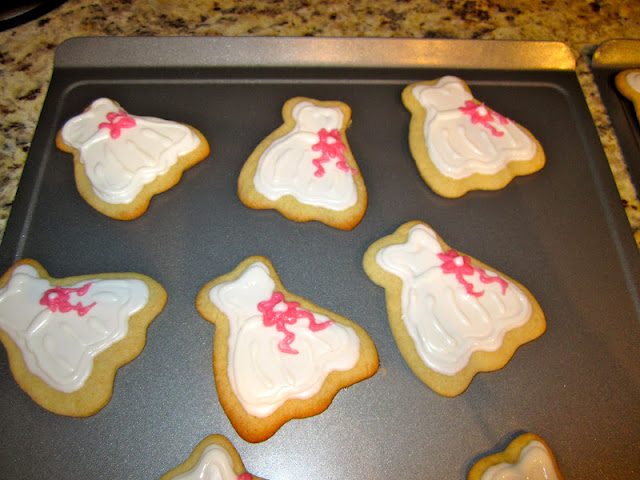
| You should end up with a bunch of these! |
I started by outlining the cookie with Wilton's Cookie Icing, and I found that heating the icing in the microwave for about 30 seconds to start, and then zapping it for ~10 seconds every handful or so of cookies kept it soft enough to work with.

 |
| They do NOT need to be perfect to look beautiful! |


Once your icing bag is filled up, you're ready to pipe! I browsed Pinterest for some inspiration ideas, but I sort of just made up my own designs until I settled on one I liked.


Questions? Send them my way! Hope this was helpful!
these are adorable! saw the pics on facebook :) I got one of those martha stewart piping kits for the wedding and I dropped the ball on using it for the cookies I made recently...totally forgot I had it! ps...i hate cutting out sugar cookies. haha
ReplyDeleteI HATE cutting them out too!!! Such a pain haha...
ReplyDelete