Showing posts with label DIY. Show all posts

November 11, 2011

Friday Not-So-Favorites... and a Wreath!

This post brought to you by husband's computer. Thanks babe! Oh wait, you don't even know I'm on here watching ABC shows and blogging... xo

My MacBook went into surgery yesterday afternoon. And after a long afternoon at the Genius Bar (and a whole lot of unnecessary shopping in between appointments and phone calls with my new genius friend Brad L.) it turns out, my little computer needs to be shipped off for repairs. Sad day.

The little guy won't turn on or charge... but I'm very thankful to Brad L. because even though he didn't answer my prayers - or fulfill the fortune cookie I got while chowing on food court Chinese food while waiting - he did manage to get my computer to turn on long enough for me to back it up before sending it off. YAY! So, fingers crossed I'll have it back sometime next week. Hang with me til then while I'm world's worst blogger ;)

In hopes of not polluting husband's computer with the same junk that probably led to the demise of mine {"someday" folders, blog pictures, etc.} I'll skip Friday Favorites and leave you with a little picture tutorial of the easiest, cheapest. CUTEST Pinterest-inspired fall wreath! I made it in my jammies on Sunday afternoon while husb watched football. Excuse the phone pics...

What you'll need:
YARN
FELT (I used 3 squares) 
FOAM WREATH
HOT GLUE GUN

 Using squares of felt, cut and hot glue rosettes in whatever colors you want. I varied the sizes of mine. And I chose colors based on what I thought looked "fall-y" and what would look good against our dark brown door. Here is a tutorial if you've never done this before: CLICK!


 Start the yarn wrapping by tying it in a simple knot around the foam wreath. Wrap your yarn - any kind/color - around the wreath until its completely covered. Don't worry about imperfections, they make it prettier. I actually went back around the wreath with some random, imperfect strands to add texture because I was too careful about wrapping it perfectly. Once your wreath is completely covered (should look something like the pic above) tie a knot to end the yarn and heat up your hot glue gun.


Lay out your felt rosettes however you want them arranged on the wreath. Then, start gluing! This is what the my end result looks like hanging on our door :) So simple... but something about it just looks cozy.

Total cost: $9.

Total time: 30 min.

I love it! If you're in the market for a fun fall wreath - or are just looking for a simple craft this weekend - make one!

October 17, 2011

Baby Shower: Little Details

I swear this will be the last baby shower post! I figured I'd share some of the little details and decorations because they were {mostly} DIY and definitely inexpensive!

First up, card stock bunting. Using a spool of ribbon, about 10 sheets of random pink/black/white patterned card stock, scissors and a glue stick I made this cute decorative bunting to hang around the house. It was a really subtle addition to the shower, but it added some PINK to the house and was a cute touch.


I cut out symmetrical diamonds from the sheets of card stock and folded the crease over the ribbon before gluing. This made it so the little triangles could slide along the ribbon since I wasn't going to be hanging or positioning the card stock until the day of the shower (since it wasn't at our house). I cut and pasted while we watched a movie so it didn't seem as tedious. But it did take an hour or so.
Total Cost: ~$10

Another small, inexpensive way I decorated the house was with light and hot pink gerbera daisies in mason jars. I bought the flowers fresh the morning of the shower, cut them down to size and tied a simple white ribbon around each jar.
Because the shower wasn't confined to a party room or an enclosed space, 8 of these jars (found them in sets of 4 at Target) with just a couple stems of daisies were an inexpensive, easy was to add a pop of pink to the mantle, food and dining tables, and the deck without having to really "decorate" every room of the house! They also doubled as "favors" since we sent one home with the friends who hung around through the evening for a bonfire. The rest brightened up the momma-to-be's house for another week after the shower, and the jars can be reused for just about anything!
Total Cost: $26

In place of games - because none of us are big fans of shower games - I set out these cute "Wishes for Baby" cards (click here for free printable template) and a stack of diapers for "Diaper Thoughts" (idea found: here) that doubled as a fun activity {especially for the boys after a few drinks... we all got a good laugh when they read their "answers" aloud!} and another subtle way to decorate.

I picked up these pink frames in a pack of 3 at Target and left them for Tony and Danielle to use in Gia's room or wherever else they want once they get some pictures of their baby girl. I had the cards printed on heavy card stock at Kinkos so that they could be saved for Gia's baby book or just to look back at and get a good laugh down the road ;)
Total Cost: $15

Aside from these decorations, the only real decorating we had to do to turn their house into a baby shower was stick a few pink balloons outside, stack the beautifully packaged gifts in the living room, hang a few pink tissue paper poms ($8 at Party City) from the dining room light fixture and display the desserts and paper products! Luckily, I had a glass cake stand and cupcake tier to help make the desserts a decoration of their own. And the pink patterned cups, napkins and plates made the food table a giant decoration of its own!
That's it! It wasn't over-the-top decorated, but it was just perfect for a coed shower and a party planner on a budget! Everything turned out just right... but most importantly, it was a fun day filled with lots of gifts and celebration for the sweet little girl who should be making her debut any day now!

We're all waaaaiiitttting, Gia Mae!

October 10, 2011

Baby Shower: The Invitations

I'm pretty sure that every detail of this shower was Pinterest-inspired. I seriously don't know what people did before Pinterest! How did I plan my wedding without it?! I seriously have no idea... but I'm so thankful for it now :)

The invitations I created are what started the inspiration for the onesie "theme" for the rest of the baby shower. I got so many great ideas from Pinterest, and ended up sort of modifying/adding to some of the ideas I came across to make something that was hand-made, custom and coordinated with baby Gia's sweet little nursery color scheme. Here are some of the pins I used as inspiration...
via 1 (see also), 2, 3
And after a few trips to Michael's for card stock, ribbon, and a paper cutter... and after several classes spent fiddling around on PowerPoint creating the printed text, downloading fonts, and emailing back and forth with the mama-to-be getting a feel for which designs she liked best, this is the invitation I came up with:


After I had the gray card stock printed (at Kinko's so that it was higher quality) and trimmed down to size, I cut light pink heavy card stock sheets to fit the envelopes I bought at Office Depot. I used a little card making paper cutter for a clean edge, and used a glue stick to attach the layers. Because hubbs likes to leave his adjusting table smack in the middle of the office, sometimes it has to double as a craft table ;) 
I got about 5 sheets of assorted pink, black & white patterned card stock in the scrap booking section of Michael's {to match the babe's nursery} and cut lots of mini baby onesies out one Friday night while we watched Dateline...


I sped this process up by folding the paper a few times so I'd get 4 onesies per cut. It was tedious, but since I did it in front of the TV it seemed to go pretty quickly. I cut enough onesies out to have 4 per invitation, and by then I knew I'd be making 30 invitations. After all these little pieces were cut out, I started playing around with placement and arrangement, and then started sticking the onesies on with adhesive dots I found in the scrap booking aisle. The dots are made of foam and raised the onesies up just slightly and this gave the whole invitation a more 3-dimensional look.

I finished off the clothesline look by cutting a small piece of white ribbon and securing it behind the onesies. I just taped the ribbon neatly to the back of the invitation. And that's it! 

The total cost for all 30 invitations was only about $35. I spent approx. $10 on printing (4 invitations/sheet of card stock), $18 on materials (paper, adhesive dots, glue stick, ribbon, and paper cutter - obviously will be able to re-use some of those), and $8 on envelopes.

Danielle loved them and people commented on how cute they were in every single RSVP I got :) All the great feedback was the best compliment I could have hoped for! Ordering similar handmade invitations would have easily cost 2-3x what I spent... and I had so much fun making these!

Easy, inexpensive, DIY... and these were just the start! When I get a free minute this week I'll show you up-close and w/ instructions some of the other fun DIY things I used in planning this par-tay!

October 9, 2011

Baby Shower

The baby shower this weekend for Miss Gia and her momma and daddy went fabulously! The weather was beautiful, all of the food and decorations turned out just how I envisioned, and most importantly - the little lady stayed in her mom's belly (and still is in there...) until after the party ~ phew!

For future reference... throwing a shower at the mom-to-be's 37th week of pregnancy is a little nerve racking for all involved! Thankfully, everything worked out! Gia, you are now welcome to come out and meet us any day you please!

Here are some at-a-glance shower pics ~ I'll post more detailed info about DIY things and desserts I made later on. Gia's mommy loved all of the decor and everyone enjoyed the sweets! :)
The invitations

Pretty food table

Gifts for baby!

Gerbera daisies in mason jars & card stock bunting

Onesie cut-out cookies

Pink drink station

Desserts!!

"Wishes for Baby" cards

Gerbera daisies around the house

The proud parents-to-be!
They got some adorable gifts and everyone had a great time! Throwing a co-ed shower meant that it was less of a "shower" and more of a party, so I was a little nervous about how the whole day would flow - but it went so so smoothly. The guys played corn hole and grilled out, the girls gossiped over mimosas and awww-ed at the itty bitty pink presents... it was perfect!

I'm not overly anxious to plan another shower or party any time too soon, but I loved {almost} every minute of planning and preparing for this one... and if a law career doesn't pan out, I think party planner may be in the running for back-up life plan ;)

June 9, 2011

Easy DIY Decor

I promised some "tutorials" last week... and I don't think I can fully deliver. Not because the crafts weren't easy, and not because I don't love them both - but because I forgot to take pictures! I was in such a hurry that I didn't snap any during pictures, but I did manage to get my act together and take enough after shots to {hopefully} show you what I did!

First up: Framed Chalkboard
What you'll need:
- A Frame. Literally any frame in the world.
- 1 piece of poster board
- Chalkboard spray paint
- Chalk, duh

 Like I said in a previous post, I pretty much followed the directions from this blog and it was basically the easiest, cutest thing I have ever made in my life. Start by removing the glass from the frame and trace its shape on your piece of cardboard. Cut out the rectangle (or circle, or whatever it may be) and head outside with the cardboard and a can of chalkboard spray paint...

This was surprisingly easy to track down at Home Depot. Go somewhere outside that is well-ventilated and away from anything stain-able. I opted for my balcony. Because my options were limited in/around our apartment, and because I was being a bad tenant but I swear it didn't leave much of a mark. Lay your cardboard flat and spray paint away! I did a couple of layers so it was thickly coated, then let it dry for an hour or so. 
Place your chalkboard spray painted cardboard into the empty frame... and then do as you please! I have seen these used as: menu displays, grocery lists, To-Do reminders, kids' daily chores/schedules, and in my case... as a place to display inspirational verses and quotes where we can see them on our way in and out of the house every day!
This is probably my favorite DIY craft of all time. I love how easy it is to customize, and the fact that it took me a grand total of 10 minutes was definitely a plus! I am excited to wipe it clean and doodle on a new verse... its been the same one for a couple of weeks, so I think its due for a change this weekend :)


Second DIY-er on this wall: Book Page Initial
What you'll need:
- Styrofoam square letter
- Hot glue gun
- A recycled book
- Some sort of knife if you are a weirdo like me

I had been itching to make this ever since I made my sister a book page wreath for Christmas! But given the time it took - and the finger burns I incurred - to make her such an intricate wreath, I modified the process a lot for this project. I started with a square of styrofoam from Michael's and used a steak knife (don't judge!) to carve out the initial of our last name. "B" obviously. You can buy foam letters, but I couldn't find a "B" so rather than continuing to look I decided I'd just make my own.
After you purchase/create your letter, sit down at a comfy table... you'll be there a while. Start by ripping out book pages and tearing them into squares about 2"x2" while your glue gun heats up. After you have a couple hundred squares torn up, start literally crumpling them into something that resembles the shape of a paper fan. Dab a few dots of hot glue down on your letter - you can start anywhere, as the whole thing will eventually be covered - and smoosh down the crumpled paper on the glue one square of paper at a time. Careful not to touch it... ouch!
After you've got the main surface covered, start filling in the inside of your cut-outs and cover the sides of the letter. If you look closely, you can still see white styrofoam inside my cut-outs... I literally only covered the areas that were visible from a normal vantage point ~ no more, no less! This recycled book page craft was much less tedious than the wreath I made for my sister, but it still took about an hour to finish. After I was done, I put a nail in the wall and balanced it from the top cut-out of the "B." Then I sat back and admired my work!
The "B" is a nice, subtle touch to the wall. I'm proud of my DIY decor and I'm always excited to find new ways to incorporate a monogram or initial into my life (obsessed? yes)! The total cost for both of these little projects: $30. Not bad, eh?

Easy. Adorable. Custom. Inexpensive. What's not to love?!

June 1, 2011

Long Weekends are the Best!

Every weekend should be 3 days long! In fact, yesterday my husb promised that eventually all of our weekends will last 3 glorious days. Someday :) Best news I have heard in a while! Of course, we have several years of hard work to put in before our weekends can start on Thursday afternoons... 

Our Memorial Day Weekend was seriously exhausting. But oh-so productive! We basically did a whole house overhaul ~ replaced furniture, swapped out wall decor and pillows from room to room, added a new entertainment center and monster TV to our living room, and crafted a new decoration or two to add to our little home. Friday night we went on the *big* TV excursion. Thanks to some awesome sales, we scored a 50" flat screen to finally complete our living/entertaining area (2 years later...) and I have never seen my hubbs so excited for something in my life! 

{Click on pictures to enlarge if you want a closer look!}
10 p.m.: Setting up huge TV on miniature stand
10:30 p.m.: Aftermath of the new TV. That I was too tired to clean up.
After bringing home the newest addition to our family on Friday night, it was pretty obvious that we needed a bigger entertainment center for it to live on. We knew this before we bought it, it was just a matter of finding one that didn't break the bank too much. It also became apparent that my beloved black and white photo wall (which Andrew was never a big fan of to begin with) would need a little TLC.  The TV was so big that the pictures looked too small, too low, etc. 

So on Saturday afternoon, after a couple hours of studying and laying by the pool, and a much needed mani/pedi - take a guess as to who did what - we headed to Ikea in search of an affordable 70" long entertainment center. My criteria: under $300, wood, dark brown, storage hidden by doors. This sucker fit the bill! It was our first Ikea furniture experience.......... I can tell you right now that despite how happy we are with the way this looks now, it was not worth the cost savings (my opinion) to weed through the self-serve furniture area to find the exact pieces/parts we needed and haul it all home to assemble ourselves. 

I wanted to rip my hair out. Thankfully  have a handy husb who put this thing together in about the time it took me to make a quick Target run and pick up Chipotle for dinner!
Andrew and his assistant hard at work...
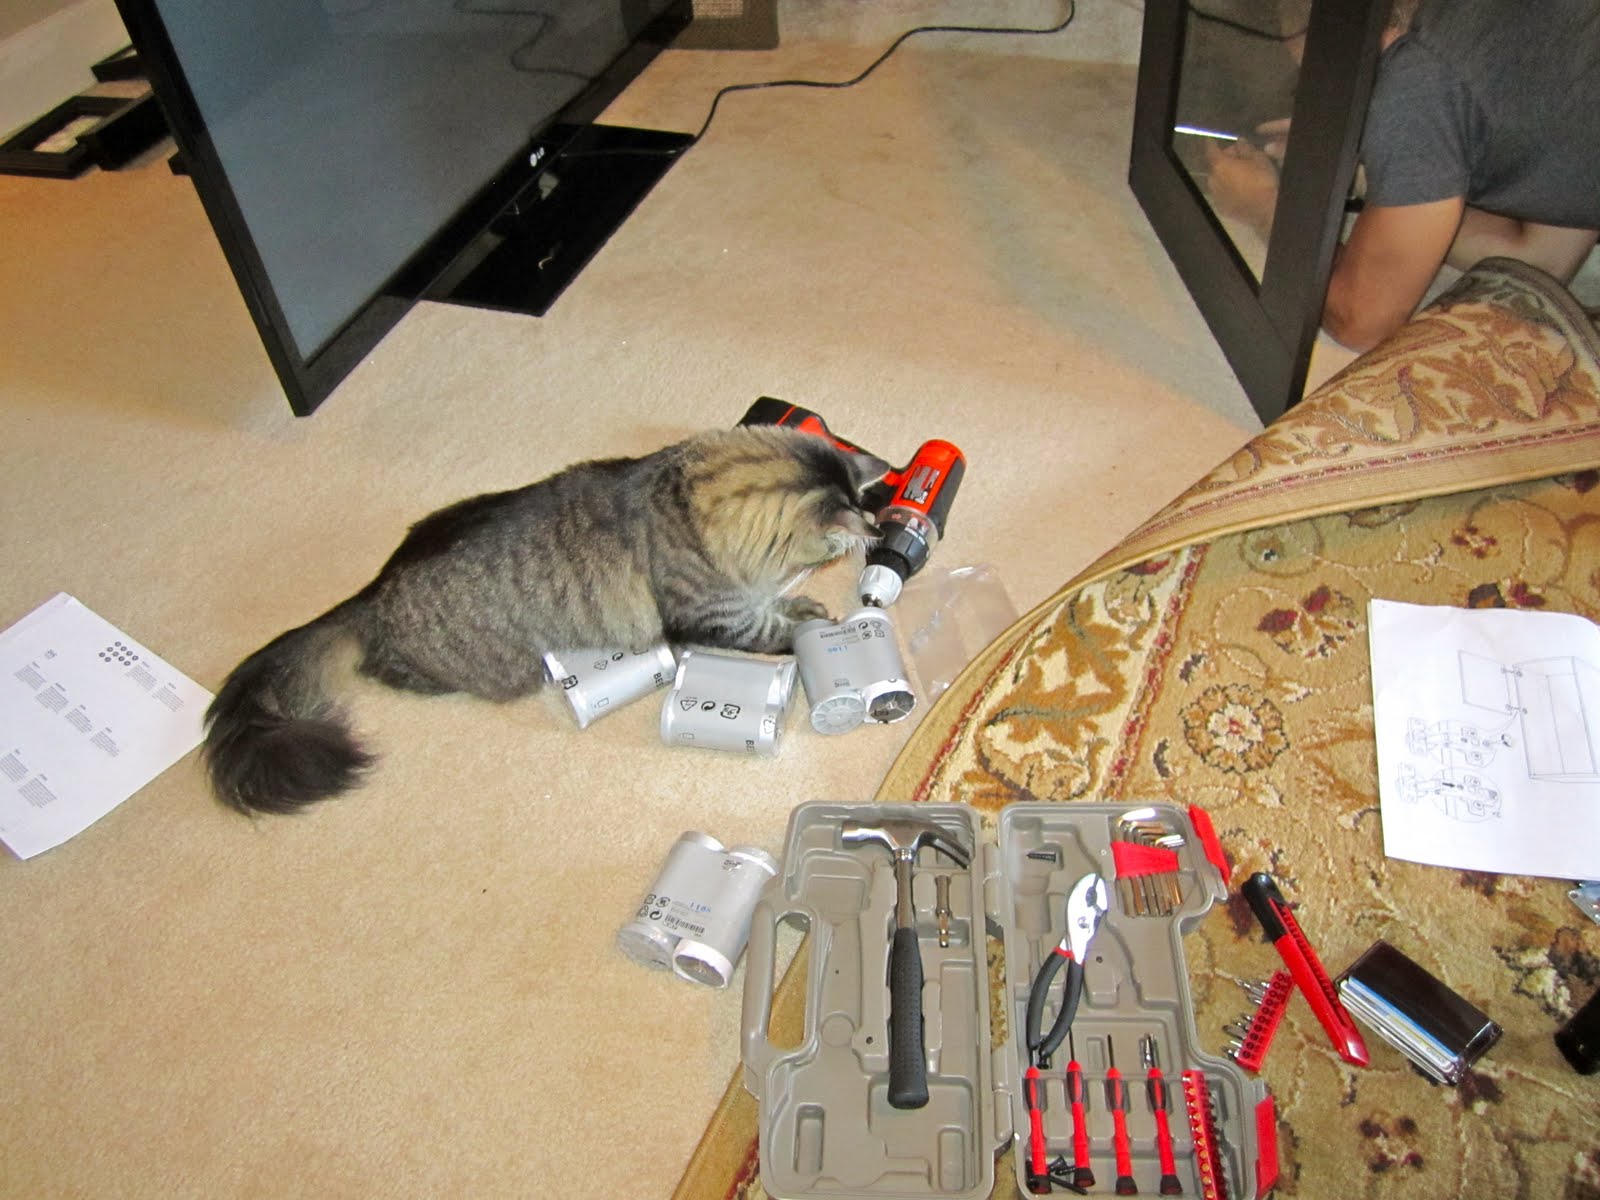
Every time we turned around Bella had a screw or some plastic piece in her mouth. Bad girl!
I wasn't allowed near the construction process of the entertainment center. Which was fair, seeing as I nailed a hole up through the top surface of our last one on my 7th attempt to assemble it without any backward pieces. Since I was banned from this process, I busied myself by moving the old living room TV into our bedroom, and the old bedroom TV into the office.

I realize how ridiculous this thing looks on our dresser... but until we get the chest of drawers to complete our bedroom set this is where it will stay! {Not worth mounting on the wall, because we'd be responsible for the hole repair when we move out.}
Most exciting part of this picture? I can now watch TV from bed without my glasses. Woop!
The drapes are also new-ish (Target clearance find, yay!). And they double as Bella's favorite climbing apparatus.
Before we put the new TV up on its new stand we decided we'd first tackle the B&W wall. I re-purposed some floating shelves (Crate & Barrel) that we had in our office and used them as picture ledges above the TV. We have 2 more shelves that are not mounted yet... my poor husb was growing impatient after hours and hours of shopping, assembling, and cord-organizing, so he decided he needed to plop down for a while and enjoy the fruits of his labor!
Looks sooo.much.better.omg.
First time I've seen Sports Center on in a long, long time. Am I in trouble?
Do you see that smirk?? How excited is he?!
I also was sick of the red accents in the living room. I decided to swap out all red and leave the brown and green. I'm shopping around for some curtain panels, probably something in the sage family. And I'd be content throwing that area rug into an incinerator, but I haven't quite decided what to replace it with - so while I'm still scouring the internet for ideas, it can stay.
Feet up. Sports on. Bud Light cracked. Ahhh he loves his life!
As excited as I was about relaxing in front of our latest splurge, we had a cookout planned for the next afternoon and I just had to get the rest of the house put back together before I could call it a night! I didn't take before pictures of our dining room wall... but suffice it to say, the only thing on it was a silver mirror.

Boring. Blah. Bare. {You can see what I mean in the background of this post}

Since my random collage wall above the TV was no longer in existence, I decided it should be recreated - but better - in the dining room! Here is what I've got thus far.....
Framed chalk board and book page "B" tutorials to come in a later post!
Chalk board idea via
I made a framed chalk board to hang in that room and decided that every so often I would change the Bible verse or inspirational quote so that we could commit some encouraging words to memory. Growing up my mom would always help us memorize scriptures and told us to "hide them in our heart." I love that this is a way for Andrew and I to both commit a few new things to memory and hide them in our hearts to draw on when we need the inspiration most! I got this idea from a blog I love and it was so easy and inexpensive.

I also made the "B" hanging on this wall using a square of styrofoam, a steak knife (woops?), hot glue gun and recycled book pages. Again, easy and inexpensive! I'll give more detailed instructions for both of these DIY decorations in a later post. This one is already a billion years long :) Finally, on to the office/guest room!
The "work" side of our office/guest room

Sorry for the dark pics. Half of these are from my phone...

The "sleep" side of the guest room/office. I'm so glad we decided on a pull-out couch in here!
The old entertainment stand, the mini bedroom TV, and all of the red accents from the living room were moved into the office/guest room! I have been doing some remote work for my Aunt that has to be done on a PC (yuck) so I've been spending about 8 hours a week in this room and am sooo thankful to finally have a TV in here to watch while I work! I also finally got around to hanging up our vision boards, and for now I stuck my painting on this wall to cover up the gaping holes left behind by the screws I muscled into the wall when I was hanging the shelves (now in family room) by myself a couple years back. The husb was not impressed with the craters caused by my a) disinterest in following the directions and b) failure to purchase the required drill. I'm on the hunt for some touch up paint ASAP!

I'm loving the change of scenery we get as we walk in the door! It is so refreshing even though the bulk of what we changed around were things we already owned.
New view of the dining area from the entryway! (Complete with cookout prep set out!)
And finally, the view of the living room, TV, entertainment center, and wall shelves from the entryway!
After working our buns off getting things organized, purchased, set up, built, decorated, and the like all night Friday, most of the day Saturday, and the better part of Sunday... we were so excited to unwind and relax with some friends and enjoy beautiful sunny day with a little pre-Memorial Day BBQ on Sunday afternoon!
I'll share my favorite summer dessert recipe with you all soon! I was too rushed to take pics this time.
Hi Friends :)
 Yummm!
Phew! That was a lonnng post. Sorry, everyone! I just was too excited to share my weekend updates and pictures with you all to trim this one down! Last but not least I'll leave you with a couple of iPhone shots of our beautiful city that I snapped on the drive home from Ikea... 

Thoughts, suggestions, etc. regarding our home decor? Feel free to leave me a comment or shoot me an email ~ our home is always a work in progress!
I love ATL :)
The end!